
Skyships Ships: Tiers, Classes and Progression Branches
Browse eight Skyships ships, compare tiers and classes, follow Wasp’s progression branches, and find the Build menu with key cost and unlock conditions.
Last updated:
Build around what slows down your resource runs: collecting ore, carrying it, maneuvering with a load or bringing it home safely. Each ship offers a different combination of mining, cargo and support research.
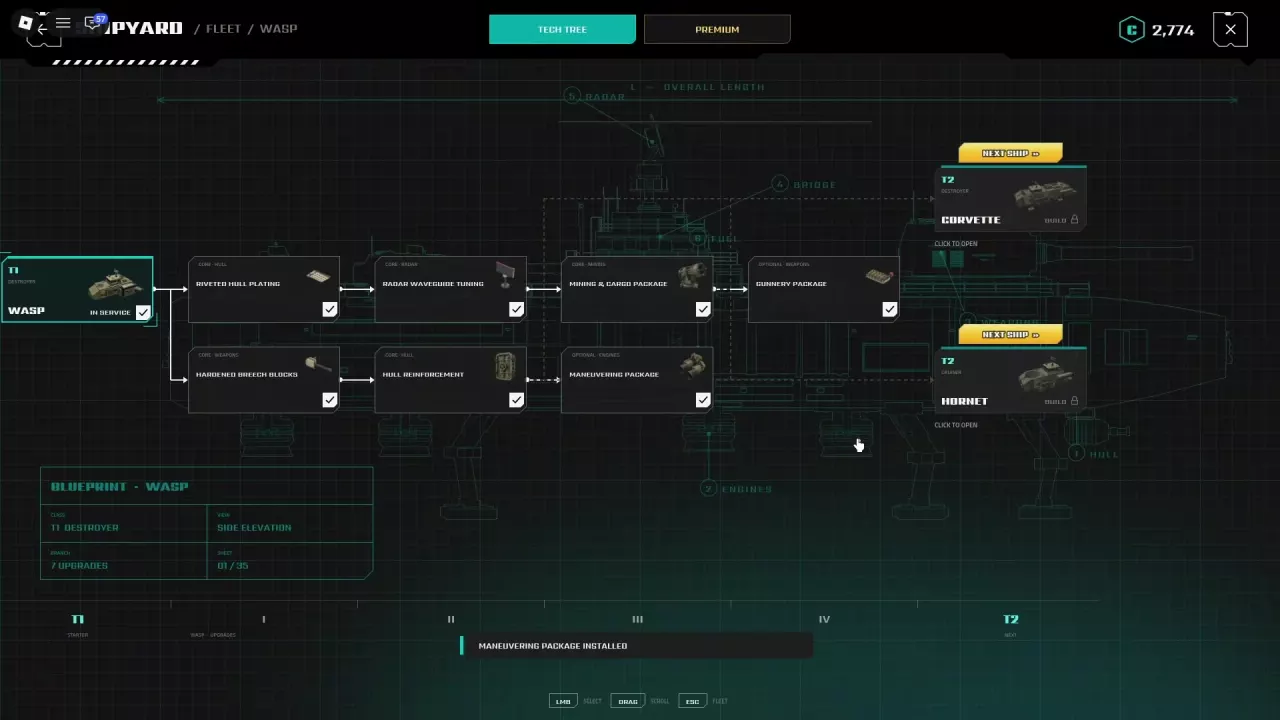
For Wasp, follow Riveted Hull Plating → Radar Waveguide Tuning → Mining & Cargo Package. On Corvette, combine Mining & Ore Package and Cargo Conversion with Reinforced Keel and Gunnery Package. For Strizh, choose Load-Bearing Frame → Cargo Conversion for hauling, then Ore Cutting Heads for mining or AESA Radar → Vectored Lift Fans for climbing. On Berkut, combine mining and cargo nodes with mobility research, and follow Sealed Compartments → Protected Cargo Vault when protecting loads is the priority.
| What slows your runs down? | Recommended research | Why prioritize it? |
|---|---|---|
| Collecting ore | Wasp: Mining & Cargo Package; Corvette: Mining & Ore Package; Strizh: Ore Cutting Heads; Berkut: Mining Power Supply and Ore Cutting Heads | Invest in mining when gathering takes longer than hauling. |
| Filling the hold too quickly | Wasp: Mining & Cargo Package; Corvette: Cargo Conversion; Strizh: Cargo Conversion; Berkut: Cargo Racks and Protected Cargo Vault | More carrying room makes capacity the next useful investment when you keep returning with a full hold. |
| Difficult approaches or climbs | Wasp: Maneuvering Package; Corvette: Reinforced Keel; Strizh: Vectored Lift Fans; Berkut: Maneuvering Jets and Uprated Lift Nacelles | Improve movement when positioning and travel are the problem. |
| Losing valuable cargo | Store resources at port; add Strizh's Cargo Conversion or Berkut's Protected Cargo Vault | Storage protects your collected resources between trips, while retention research improves what you keep after death. |
Spend on the problem you encounter most often. A larger hold is useful when capacity ends your trips; a mining upgrade is a better next choice when you spend most of the trip gathering. If the laser cannot reach or fire at a deposit, fix the mining position or laser warning before treating it as a build problem.
Use your current ship's Tech Tree in the Shipyard. The ship upgrade reference covers research requirements and installation; the routes below explain which combinations to prioritize.
Use the training M14 14mm MG as a practical early weapon. Obtain its blueprint from the training contract, build it with stored Iron through Market → Blueprints → My Blueprints, then equip it in the hangar.
For resource gathering, follow this research route:
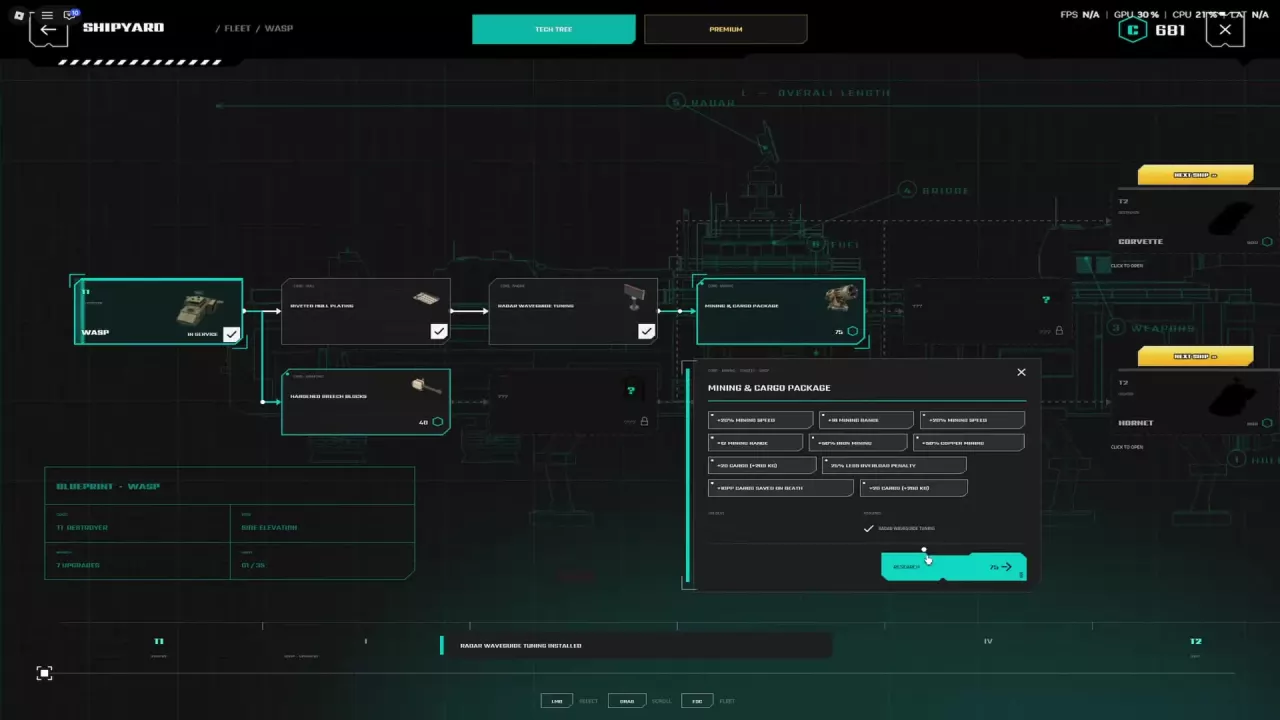
Mining & Cargo Package improves mining speed and range, Iron and Copper mining, cargo capacity and overload-related performance. It is the first priority when you want Wasp to gather and transport upgrade materials.
Radar Waveguide Tuning also supports the trip itself: it adds 150 radar range, 40 fuel, 5% acceleration, 5% hull and 5% explosive resistance. Its unlocks include Radar MK2, Fuel Tank Medium and Storage Room Expanded.
For a gathering-focused Wasp, finish the mining package before spending broadly on weapon upgrades. If combat is stopping your runs, choose the support branch that addresses it and use the early PvE weapon recommendations to decide what to equip.
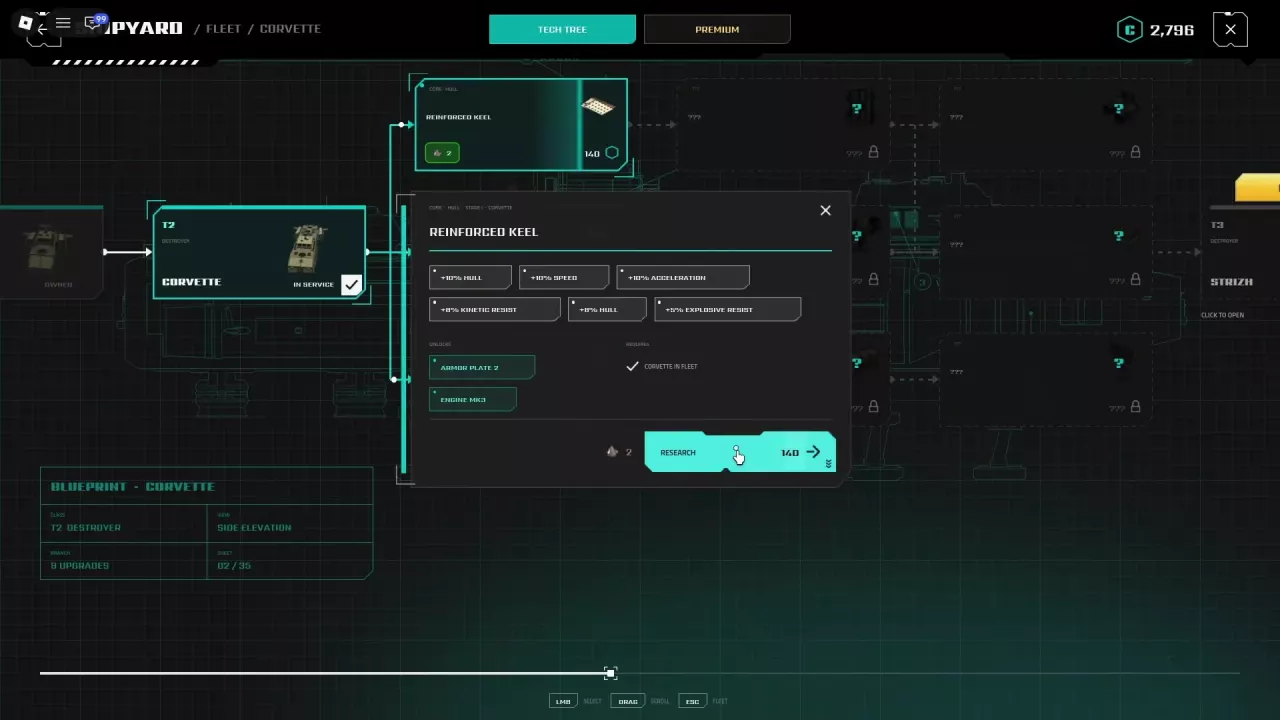
Aim for Mining & Ore Package + Cargo Conversion, supported by Reinforced Keel + Gunnery Package. This gives you a resource-focused direction with room for defensive development when your trips involve fighting.
Reinforced Keel is a useful early investment once Corvette is in your fleet. It costs 140 CR and 2 Iron, improves hull and resistances, and adds 10% speed and 10% acceleration. It also unlocks Armor Plate 2 and Engine MK3. The movement benefits make it relevant to resource trips as well as combat: you gain support for traveling with your ship while developing its durability.
Prioritize Mining & Ore Package when gathering is your immediate goal, and Cargo Conversion when developing the cargo side of the build. Add Gunnery Package as combat becomes a regular part of those trips.
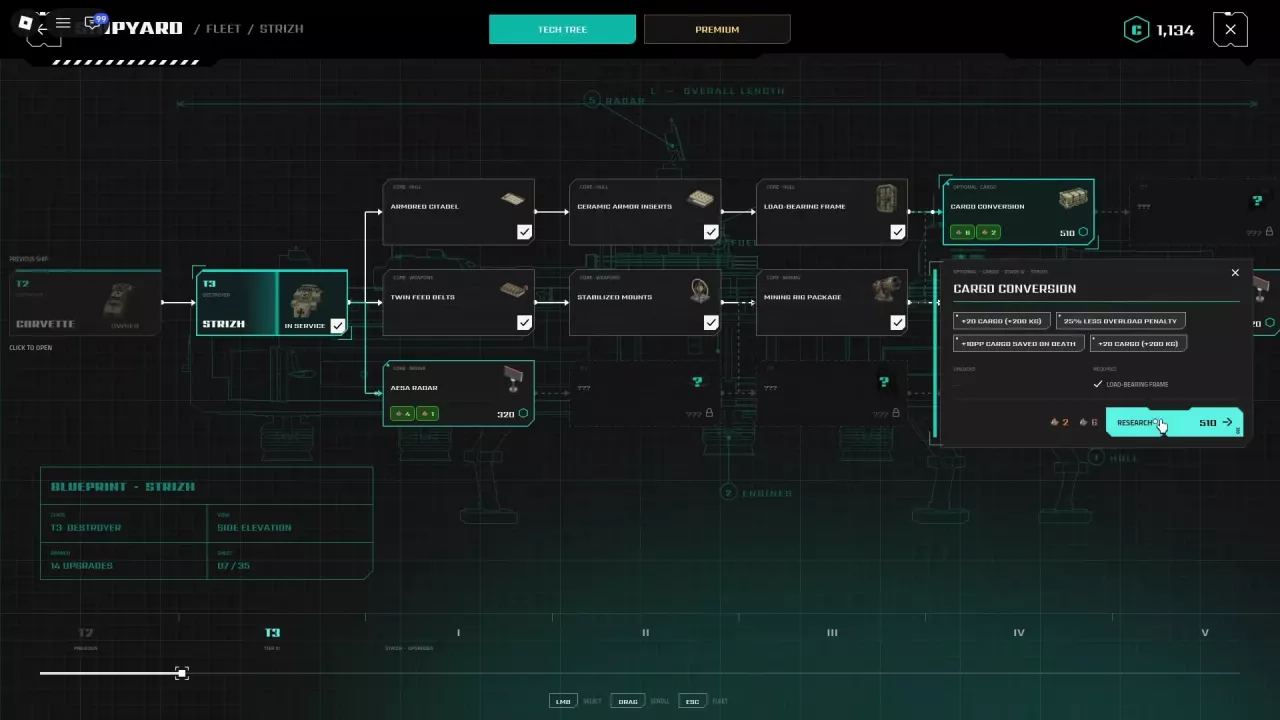
Follow Cargo Conversion → Interceptor Director if your setup uses anti-air weapons. Interceptor Director reduces anti-air weapon spread by 10% and improves anti-air cooling efficiency by 15%. Its cost is 300 CR, plus 2 units of the brown-gold-icon material and 6 units of the gray-icon material.
Those benefits apply specifically to anti-air weapons. If your equipped weapons do not use them, keep mining, cargo and general ship support ahead of this specialization.
For a Strizh that fills up too quickly or struggles with overload, prioritize Load-Bearing Frame → Cargo Conversion. Cargo Conversion costs 510 CR, plus 6 units of the gray-icon material and 2 units of the brown-icon material.
It provides three distinct benefits:
The retention bonus adds to the retained share; it does not set your final retention to 10%. These figures apply to Strizh's Cargo Conversion.
| Your next priority | Research route | Benefit |
|---|---|---|
| Mining development | Cargo Conversion → Ore Cutting Heads | Opens the next optional mining upgrade, priced at 590 CR. |
| Better climbing | AESA Radar → Vectored Lift Fans | Adds 10% climb rate and 5% hull. |
Choose Ore Cutting Heads when gathering remains the slow part of the trip. Choose Vectored Lift Fans when climbing and positioning take priority over further mining development.
Vectored Lift Fans costs 400 CR, plus 2 units of the orange-icon material and 5 units of the gray-icon material. It unlocks Fuel Tank Large and Storage Room Hold, and opens access to Sealed Compartments farther along the tree.
Build Berkut around Mining Power Supply, Ore Cutting Heads and Cargo Racks, then support those resource upgrades with Maneuvering Jets and Uprated Lift Nacelles. Prioritize mining when gathering is slow, cargo when the hold fills first, and movement when approaches or travel are awkward.
Follow Sealed Compartments → Protected Cargo Vault when you are carrying loads you want to protect. Protected Cargo Vault adds 20 cargo units, equivalent to 200 kg, and 10 percentage points more cargo retained on death.
Keep banking resources at port even after buying retention research. A retention bonus improves the share kept after death; storing the load removes the need to keep carrying it into the next trip. See cargo capacity, overload and port storage for the banking process.
Choose Escort Search Radar when wider radar coverage and easier turning are priorities. It requires Berkut in your fleet, costs 510 CR plus two material requirements of 5 and 2 units, and adds 300 radar range and 14% turn rate. It also unlocks Radar Phased. If Credits are tight and cargo space is ending your runs, put the cargo investment first.
For a broader mining-and-combat build, add Sponson Ammo Feeds, Gyro Stabilized Mounts, Mechanized Ammunition Feed and Precision Cradles alongside the resource and movement research. Treat these as combat-support additions when fighting is part of your trips; keep your immediate mining or hauling bottleneck ahead of optional weapon development.
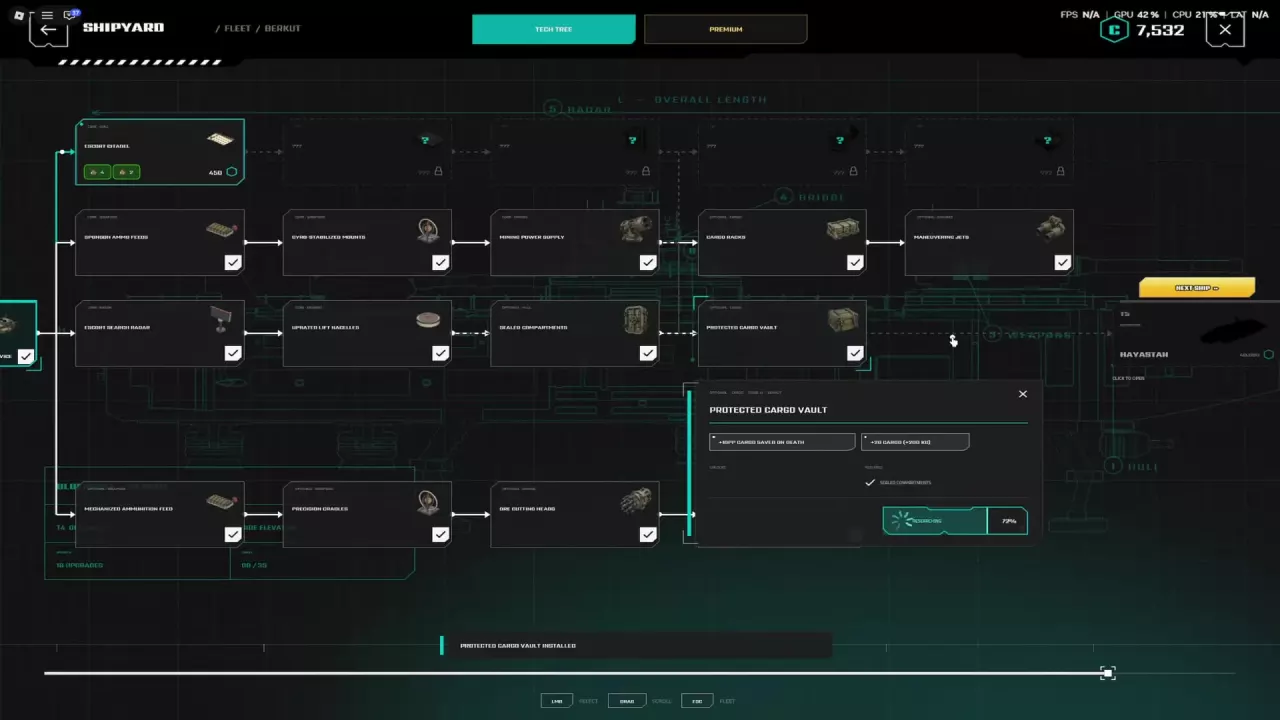
Choose your next research node before selling the haul. Reserve the materials it needs—such as Iron or Copper—and sell the surplus to cover its Credit cost. For example, keep 2 Iron aside if Corvette's Reinforced Keel is your next purchase. Keep Nickel too when your selected research calls for it, rather than treating every resource as sale stock.
Store the haul first, then decide what to sell. Depositing resources into storage and selling them for Credits are separate actions. Use the ore-selling and Credit guide to choose which surplus resources to convert into money.
For continued destroyer progression, choose Corvette after Wasp, then work toward Strizh and Berkut. Strizh offers a clear cargo-capacity and overload upgrade; Berkut offers a dedicated cargo vault alongside its mining and movement options. Strizh's ship price is 5,000 CR plus construction materials, so budget for the ship as well as its research. The ship catalog and progression branches cover the other ship choices and build entry points.
Browse eight Skyships ships, compare tiers and classes, follow Wasp’s progression branches, and find the Build menu with key cost and unlock conditions.
Find Skyships ship upgrades for Wasp, Corvette, Strizh and Berkut, including research costs, prerequisites, cargo bonuses, weapon unlocks and installation steps.
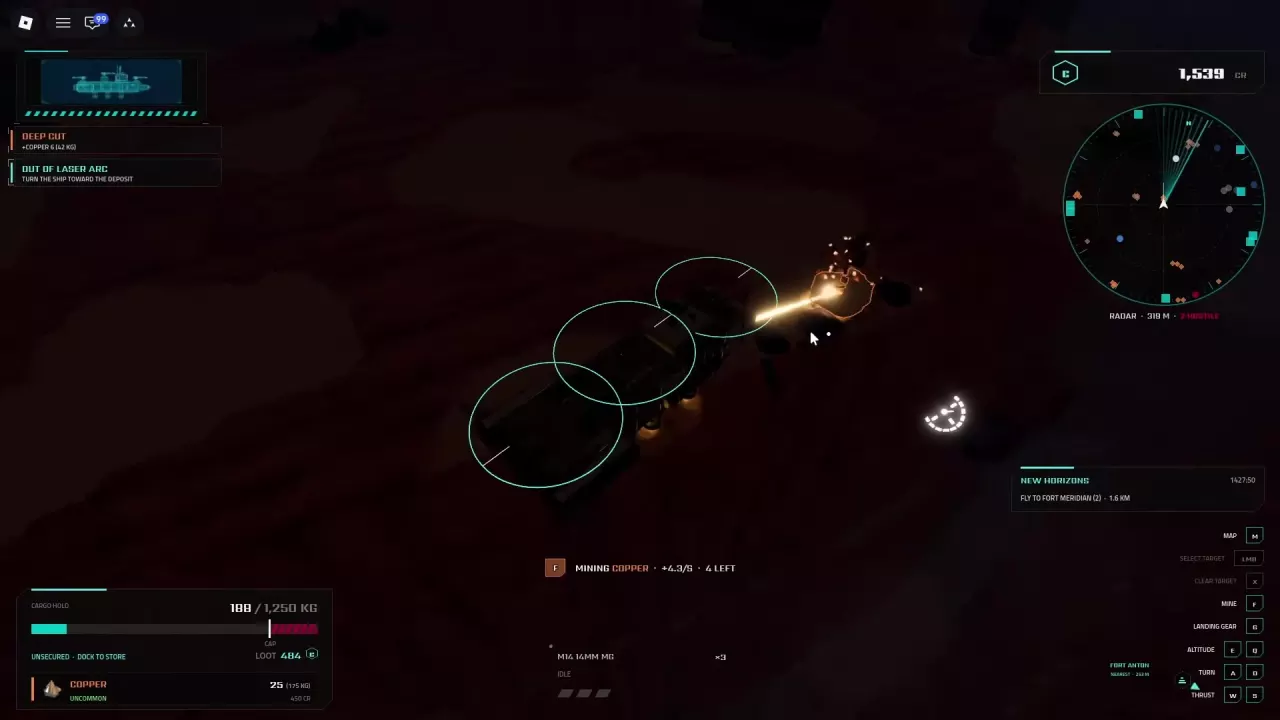
Find ore deposits in Skyships, hold F to mine, fix laser range and arc warnings, and improve your mining runs.
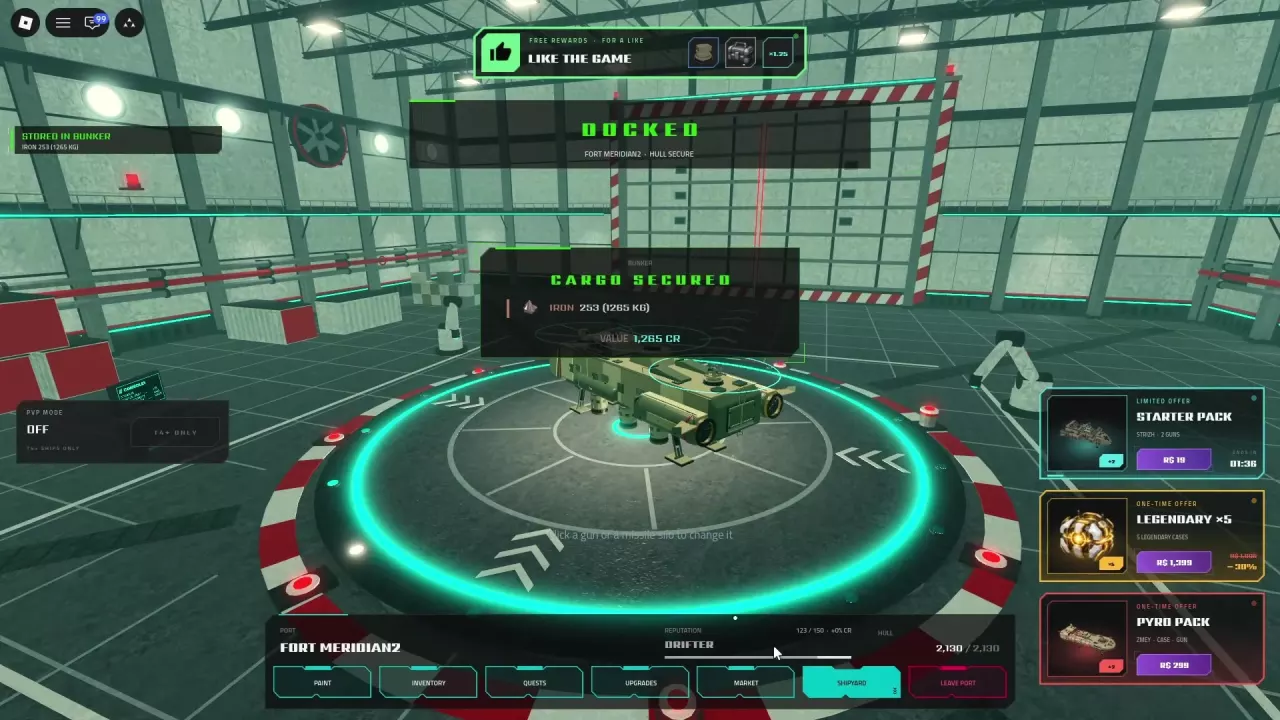
Learn how Skyships cargo weight and overload work, how to store resources in the Bunker, and which upgrades improve cargo retention.
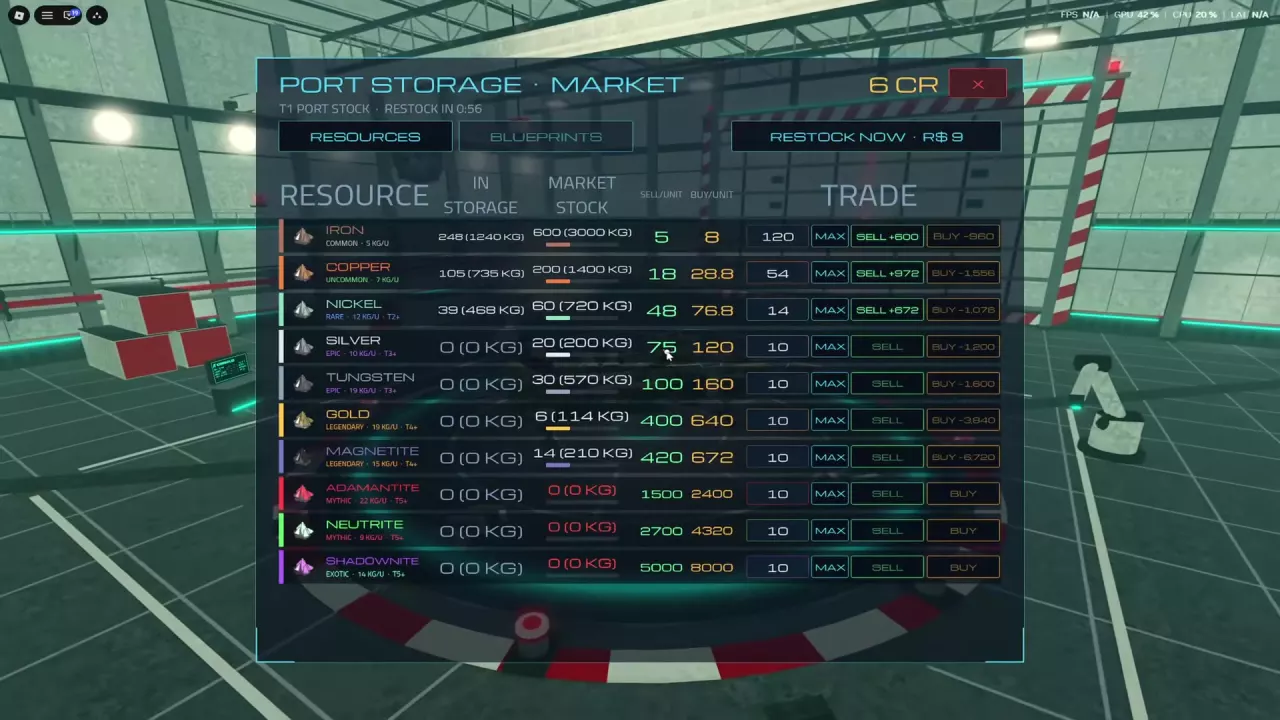
Earn Credits in Skyships by selling ore and completing suitable contracts. Compare all ten ores by CR/kg and choose what to carry in limited cargo space.
Choose your early Skyships PvE weapon: M14, Hydra Rockets, AK-101 or Bofors. Compare starter access, practical reach, unlock costs and mount compatibility.